Showing posts with label Projects. Show all posts

Thursday, March 1, 2012

Reorganizing the Cabinets

I constantly feel like my kitchen is a disorganized mess, even though the kitchen I have now is three times as big as what I had before. So, I decided I needed to start looking at the way I'm utilizing my cabinets & see if there are changes that need to be made.

This is the cabinet I stored my spices in (I had already pulled a ton of stuff out before I had the "aha moment" to photograph the before & after)...

This is all the stuff I pulled out of that cabinet before the picture was taken!

This is the cabinet right next to it, and, immediately right of the stove. I had just put baking dishes & measuring cups in it before. It looked fine, right?
Yeah, but it wasn't the best use of the space.

After thinking about it awhile, I decided to move all the spices over to the cabinet closer to the stove, and, WOW - it works much better. I picked up a stair stepped shelf to help organize the spices, and, some $1 plastic containers to place my spice packets in. Doesn't this look MUCH better?!

In the corner, lazy susan cabinet I placed my measuring cups, mixer attachments & some mixing bowls - since that is the area I bake in.
It's still not perfect, this cabinet is a terrible waste of space the way they did it - but, it's better than it was!

I have many, many more cabinets to move on too. My goal is to get this all completed before I start refinishing the cabinets in May. Stay tuned :)

Wednesday, February 29, 2012

Lego Instruction Book Organization

If you have a child that loves LEGO's, chances are you have a million instruction booklets. We were constantly digging through piles, books, shoeboxes to find the one we needed - I knew I had to devise some type of system. The hopes of keeping each set in it's own box, long went away - so I needed a universal system for the instruction booklets.

I started by laying everything out on the table. This is what I was left with...


After I thought about it (for awhile) I realized that the only real solution for now was to put them in a binder. To simplify things, I bought several packages of sheet protectors at Dollar General, and, put a booklet in each packet. As much as I would love to divide the booklets up & put a page on each side to make it easy to flip through them to build...I would have needed a 12 inch binder for that! This was the easiest solution for now.

I have visions of laminating each booklet - but, that will take a ton of time, patience & laminating sheets. Maybe someday :)

Monday, February 27, 2012

Home Managment Binder

This may be my proudest project yet. I HATE being unorganized, and, I was finding that the paperwork was taking over my life. This is step one in curing that!

I had seen ideas for several binders on the internet, but nothing that really worked for me - so, I decided to make my own!

I started with a 3in, 3-ring binder. Of course I wanted it to be pretty, so I opened up photoshop & worked on a cover page & a spine cover for my binder.

Here are closer looks at my covers. {you will see a different name on these - my SIL could use a little help in organizing too, so I made her one for Christmas!}


Inside my binder I have the following categories...
Meal planning
Gift Giving
Projects
Financial
Photography
And my volunteer projects (which include the church website, and, Mom's Group)

Each of these categories have customized printables that I use to plan my meals, track birthdays & Christmas, household projects, warranties & online log-ins & passwords. Household maintenance, vehicle maintenance & a long term "to-do" list area ll included. I also have sheets for pictures to edit, and, pictures to order - so I don't forget what I'm working on!

I have been successfully using this for 3 months now, and, It's safe to say it's now a regular part of my routine. It makes everything so much easier!

Next up...organizing Cole's school paperwork, projects, artwork :)

Friday, February 24, 2012

Homemade Christmas Gifts

This year I had so much fun taking a little extra time & making some homemade gifts... all pinterest inspired, of course :)

I'm not a super crafty person, but, I think these projects were even easy enough for me.

Picture Ornament (this picture was taken before the ribbon was tied on the top)

Personalized Coasters. These are awesome! I made both photo & monogram ones. We gave them to teachers & friends.

These puzzle piece ornaments were perfect gifts for our Autism Support Group friends and therapists.

Next year I hope to make many more homemade gifts :)

Our LONG awaited new floors!

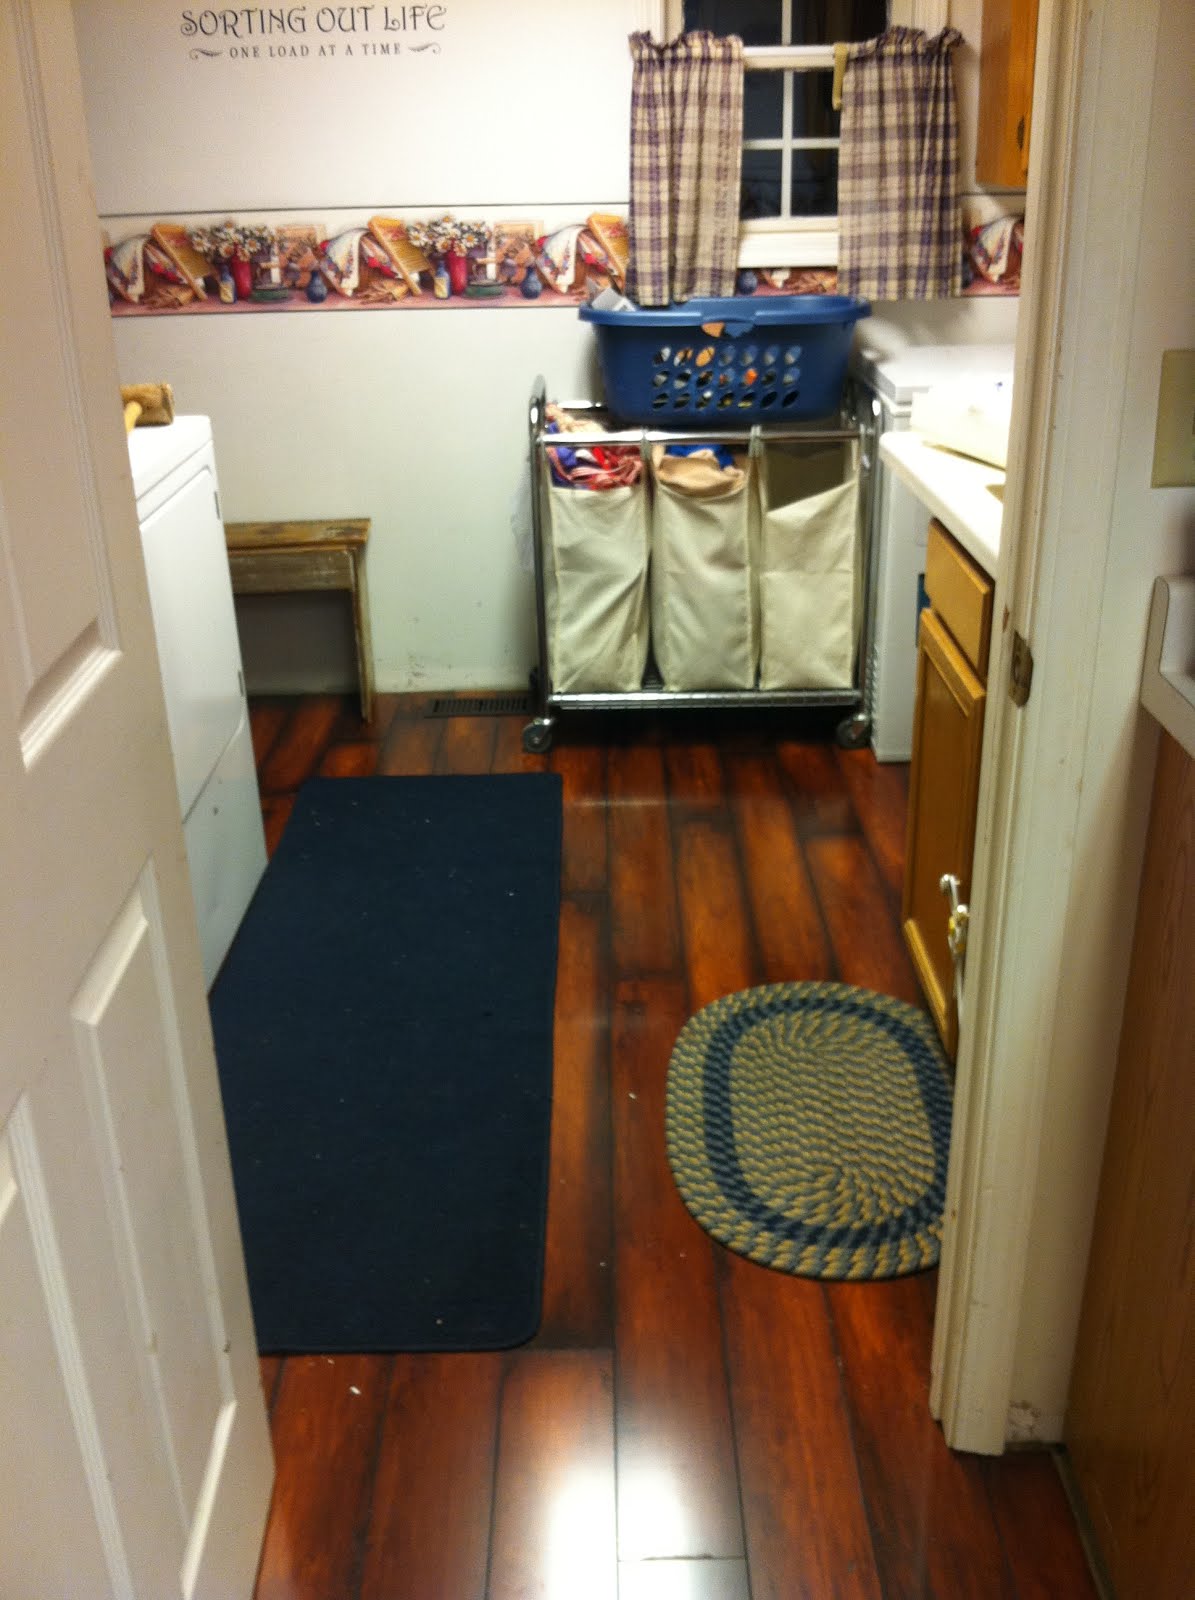
Since Cole was old enough to walk, I have dreamed about having different floors. Something that does not stain every time apple juice, ketchup, (vomit) hit the floor. Last fall we picked out what we wanted, and, started saving...right before Christmas Lumber Liquidators had a huge sale that finally made our flooring affordable. Bright and early the day after Christmas, my hubby got started!

We decided to run this beautiful Vintners Reserve Laminate Hardwood through our Living Room, Kitchen & Laundry Room. It was a big project!

This picture shows the {ugly} laminate we had before in the kitchen & laundry room, and, the beautiful wood we replaced it with :)

When we started to pull up the carpet in the living room we found real hard wood! Sadly, it was pieced together in several places with plywood - so we didn't have the choice to refinish it.

Here's the living room...almost done!

Beautiful!

Don't worry, I have plans for those kitchen cabinets. Soon they will be a beautiful antique white :)


And look, we even got a housekeeper as a bonus!

There is still so much work to be done. Paint in the living room, stairway & kitchen. Trim painted & back up. Area rugs to purchase. Cabinets & counter tops to refinish. Yep...the projects just keep coming! (too bad the money doesn't come with it!)

Tuesday, February 21, 2012

Our LEGO Build Table Project

My son is CRAZY about legos! For 2 years I searched & searched for a lego table that would work for us. We had a small space with built in shelves that I really wanted to utilize for legos - so I had to be very choosy. One day I stumbled upon this blog post by Jen at iHeart Organizing..and I knew what I had to do. First, check out my inspiration here


So, first, I started with this cheap table I bought from the hotel I worked at years ago. It was $5 when I got it. I originally picked it up as a desk for Cole, but it never fit where I wanted it to - so it had been in the basement for several years.

I started by priming the entire table, so that the paint would adhere. (only the top is primed here..I forgot to take a pic with the entire table still white)

After it was primed, I taped off the top & began painting the rest of the table the beautiful blue paint I used as an accent color in Cole's room.

And, finished the top off with 2 coats of chalboard paint so the boys can draw roads, buildings, space - whatever goes with their lego creations.

The most expensive part of this project was definitely the chalk board paint. At $15 a can, it was a hard pill to swallow - especially since I only used about 1/4 of that & still have tons left. Hopefully I will find more projects in the future to use that up.

So far, Cole is loving the table - it gets used quite often :)

Wednesday, February 15, 2012

My new love :)

5 years ago my husband got me my first KitchenAid Mixer. This little red beauty is gorgeous and I love making cookies, cakes & other special treats with it. But, when it came to making my homemade bread...well, it just couldn't make the cut :( The motor wasn't powerful enough to take on the 4 cups of flour it takes to make one loaf. So...I sat & waited, dreaming about the day I could purchase the professional 600 model. Then came Christmas....

Jason's Mom & Dad SHOCKED me with this sleek baby as a gift. Just look at her. If the little red beauty is like a 20 year old newlywed, well, this beast...she's like a cougar :)
This baby will whip through 8 cups of flour on speed 2, without even a thought. Oh, how I love her.
And you see that beautiful spot she's in...yep, the hubs had to cut the cabinet for her to have a permanent home. But it's perfect...she just belongs there :)

Her she sits with the little red beauty...
There is just no comparison. Sorry beauty, I've had to upgrade to more experience :)

Monday, February 13, 2012

Homemade Valentines

I'm always looking for cute, homemade things to give to the teachers, and, valentines day is kind of hard. I searched & found the cutest idea on Pinterest, and it was so easy!

Our Teachers, Therapist & Bus drivers will all get a birdseed valentine to hang outside & feed their feathered friends. How adorable are these?!


All I did to package them was cut open a fold over sandwich baggie, lay some red tissue paper behind the heart, and, tie with raffia.


I thought these turned out so cute!

If you want to make your own...mix 3/4 cup birdseed, 1 tbsp flour & 2 tbsp water together. Pack tightly in a heart mold, poke a whole for the ribbon to go through (we used a sturdy straw), and bake in a 170 degree oven for 1 hour. If they aren't totally set after the hour, leave them in a bit longer. When they are done, transfer to a cooling rack & allow to cool several hours. Then just tie your ribbon on & package up.

Sunday, January 22, 2012

A Very Hungry Caterpillar First Birthday - Decorations!

Our little caterpillar, with a big caterpillar!
For this, I purchased yellow & green paper lanterns from Amazon (base the size you purchase on the area you have to hang it in), cut the eyes out of construction paper (using my oval cutters from CM), and added purple pipe cleaners for antennas. We didn't have what we needed to hang it perfect, but this worked I thought :) After the party, we hung this in Jacob's room from the ceiling - it looks adorable!

My custom Birthday sign..
To create this I cut circles out of Green Paper (using my old time Creative Memories circle cutter!), and, the letters out of white paper on my cricut. It turned out so perfect, I love it! And, I can always replace the circle with the # birthday & reuse the banner. LOVE IT!

Table Decor..
I kept it pretty simple. Yellow & Green plastic table cloths ($1.25 each from DG), a helium balloon (opposite color of table cover), and, a picture of Jacob in a $1 acrylic stand (stands & pics printed at walmart). Family & Friends got to take home a picture when they left :)

Build your own caterpillar station..
I wanted an activity for the young children, and I thought this would be cute. I cut the colored circles out of construction paper (heavier grade) using the circle cutters again, cut 2 purple antenna's from pipe cleaners and pre-bagged these items. Black markers & glue sticks were in a basket on the table for them to put their caterpillar together.

My personal favorite...
This was definitely my favorite. We had paper & pens available for everyone to write a note to Jacob. We will open these on his 16th birthday. How fun!

1st Birthday Pictures..
Printing photo's is truly more affordable now than it has ever been. Take advantage of that, and, spice up a cake or food table, with prints of your little one. I printed copies of his 1st Birthday Smash Cake shoot, framed them ($1.50 black wood frames from Walmart) and placed them around the cake (oops - you got a sneak peak! full food post coming next!). We let the Grandparents each take a framed 8x10 home with them.

We also had copies of the book sitting around on tables for people to look at, and, Children to read.

This was such an easy First Birthday, and the Decorations were pretty affordable - especially when so much can be reused, or was given away as favors.

Stay tuned for my post on Birthday Party Food!

Thursday, January 5, 2012

Cole's Room...Progress!

Cole's room is finally starting to come together. I love progress!

For those of you who missed it. In November, we painted Cole's room "Later Gator Green", by his request (of course). Mom had this great vision of deep reds & browns (similar to what I did his original nursery in), but he didn't agree. After months (and I mean MONTHS) of debate, I was kindly reminded by my husband that it is, after all, "Cole's room". Ahhh...I was defeated. Well, not really - I scoured the interent for a GREEN room idea I could live with,and, found this wonderful idea for one wall to be striped. I was sold. We painted, striped & then put his letters back on the wall.
Then we started in on the closet. I had found this great idea on Pinterest to turn his 2nd closet into a built in study area/office. Since Cole already had 2 closets in his room, this was perfect & would eliminate so much clutter in the outter room. Getting my hubs on board wasn't easy at first, but once we got started, he quickly saw the genious in my plan :)
We started by painting the inside of the closet. I didn't want this to look anything like a closet anymore. But, I also didn't want that crazy green ... so, what did I do? Well, I found the most obnoxious blue of course! Which quickly became our accent color in the bedroom.
Once the paint was up, Jason ran electrical inside the closet for the computer & video games, and, we hung shelves high for me to organize all the crap I don't want to be an eye sore every day. We debated for awhile on the actual desk, I wanted to just use a small closet shelf, but Jason feared it woudln't hold up over time. So...he installed a counter top. It's perfect! Very sturdy & looks so good.
Here is our creation....

The frames will eventually hold some cool subway art I'm working on, but, in the meantime I couldn't handle them being empty - so I put some neat pictures of Cole with Jason & I as he grew up. The picture in the middle caught my flash, but it's a shot of Jason & Cole standing by the lake fishing...I love that :)

Here is a shot to show the contrast between the room colors & the closet colors.

There is still much to do. (Like labeling the storage bins, corralling the computer cords, Art for his room) But this is certainly a step in the right direction. I have a happy little boy to say the least!

(Heaven help us when we have to paint over those colors! ha!)

Wednesday, May 18, 2011

Summer Project: Bookworm

Disclosure: I am not crafty or creative! Thank God I have boys & they are not critical of my skills (or lack thereof!).

Our first summer project that I will share is our bookworm. In the Winter, we do a great job at reading everyday, but, in the summer - it gets harder. Between outside activities, vacation, and the pool we don't do as good of a job. Cole's Kindergarten teacher recommended that he read 100 books this summer, so we decided to create a bookworm. For every book he reads, he gets to add another "bubble" to his worm. It's hanging in the Kitchen (clothespin to the window where his house rules are), hopefully the visual helps keep this motivating. It's gonna be a big worm if we make it to 100!


Another reading project we are starting is slowly adjusting Cole to chapter books rather than just short stories. To help with this, Jason is purchasing a book that he liked as a child, and, he & Cole will read a chapter everyday he is off. Daddy reading to him is a real treat - so I think this will be very motivating for Cole! Adding chapter books into his reading will help him hold his attention span for longer periods of time, and increase his story telling skills. I'm excited to see how this goes (well, once Dad finds the book he wants that is!).

Thursday, April 14, 2011

Cleaning Tips...from the girl who hates to clean :)


Yes, I have been cleaning all my life - and, quite frankly I'm sick of it! I think after about 20 years of cleaning you should get a pass for the next 10 at least. But, alas...that has yet to happen. And, then for some crazy reason, when I became this stay-at-home Mom...all the sudden it was like my job now...what's up with that?!

So..here are some of my tried & true tips, to hopefully make your life easier :)

1. Keep an extra scrubby sponge (you know, those things you use with body wash - I have no idea what they are really called), in your shower. When your done & before you get out - take that & doing a quick scrub on your entire shower & the door...with soap still on the walls & the door, and, the hot water to then rinse it off - your shower is sure to sparkle like you just spent an hour on your hands & knees.
2. Always dry your fixtures on the tub/shower when your done drying yourself off. This will prevent spots & look like you have worked really hard every day to keep them shining.
3. When your done washing your face, use that same washcloth to wipe down the bathroom vanity. No cleaner needed - just the hot water on your washcloth & all that hairspray & make-up from the day will come right up. Again, dry the fixtures so they sparkle.
4. After you do your dishes from dinner, take that washcloth you just wiped the table down with, and, throw it on the floor - walk around to any spots that have mysteriously appeared throughout the day (surely that doesn't only happens in my house, right?!) and scrub it with your foot - DO NOT BEND OVER, there is just no need :)

And, my last & final tip...keep lots of good smelling things in the house. Plug-ins, Scentsy (my personal favorite!), candles, etc. If your house smells good - people are less likely to care about that load of laundry that has been gracing the top of your dining room table for 3 days BEGGING to be folded.

I would LOVE to hear what tips you have that make your cleaning time shorter & more enjoyable! Please share :)

Thursday, March 24, 2011

Cleaning Schedule

While most people are starting their spring cleaning, I find myself just getting a handle back on my everyday cleaning. After we brought Jacob home from the hospital, it felt like once again everything went to pot! The mounds, and, mounds of laundry piled up. The dishes were always begging to be done...along with a huge stack of bottles. And, my floors were in dire need of mopping - mostly because Cole was attempting to pour his own juice everytime I found myself stuck in the chair for an hour nursing!

Well, a couple of weeks ago I carved out a plan. Determined to find a way to get my house back in order, and, keep myself from feeling like everything had to be done everyday, I created a cleaning schedule.

Mondays - Bathrooms (3) and laundry
Tuesday - Counter tops, Tabletops & Dusting
Wednesday - Floors and laundry
Thursday- Wash bedsheets, Clean out the Van, Pick up the deck/yard
Friday - Budget & Bill paying, Grocery Shopping if possible
Saturday - Errands, Grocery Shopping if can't do it Friday, Laundry
Sunday - FAMILY DAY!

This is week #3 on the schedule and it's working pretty well. (Obviously we have to do the general "pick-up" everyday.) I have had times that I haven't gotten to that days chores, and, it wasn't the end of the world - but, if I stay on top of them, most days I can have them done in about 1/2 the day - leaving the rest for time with the kids, cooking, or other activities.

I really hope that I'm able to stick with it going into summer so that we can have more stress-free fun days :)

Do you have a cleaning schedule? How do you handle getting everything done & not loosing your mind? :)

Wednesday, March 23, 2011

Spring Projects

I'm so excited for Spring to get here! Maybe not for the same reason as others though...I am NOT a flower person! Seriously...I kill flowers, flowers they say can't be killed, yes, I successfully kill them. (But I love growing vegetables!)

Here are my upcoming projects I hope to complete before we open the pool this summer :)

Raised Vegetable Beds
After fighting the terrible ground, animals, Cole & his motorized Gator, and, Jason's lawnmower....I have finally decided to give Raised Vegetable Beds a try. I have really reduced my garden down to only what I use & enjoy eating homegrown. For example...my carrots never tasted sweet, but yet I just kept planting them?! I'm still struggling with bitter lettuce, not sure if I will try that again this year or not. I will definitely plant tomatoes, peppers, green beans, potatoes, onions, zucchini & yellow squash. Jason is hoping to start building the beds in the next few weeks! I'm sure pictures will follow :)


Cole's New Room
When we found out I was pregnant with Jacob we gave Cole the option to stay in his room, or move to my office, which was a bigger room. He chose to move (thankfully! we didn't have to redecorate a baby nursery!), but we never really had time to paint & decorate his room...so he still has the same Cream colored walls & Americana theme curtains that existed in my office. I have a neat design to paint (stripes, 2 different kinds) and have been selecting special photos to have blown up & framed for him. Because the design is more difficult, we wanted to wait until Spring so that we could have all the windows open & take our time painting. My goal is to do this sometime in April - probably toward the end, maybe the beginning of May.

De-Clutter!
This one is huge. We have stuff, lots & lots of stuff. Most of it is crammed into our basement (we don't' have a garage) and just need to be sold, donated, given away. My ultimate goal is to have the basement cleared out to where one side is for Jason's fishing supplies (he has A LOT!), and, storage. And the other side is for exercise equipment, and, a play area for the kids. Although the basement isn't finished, it is decent sized and provides a nice area for the kids to run, throw balls, etc - without tearing up my house! The hard part for me will be getting rid of things. Do you know I still have ALL the centerpieces from my wedding?! How insane is that. If anyone is interested in silk lilac colored hydrangea centerpieces, I can hook you up :) Ugh...ridiculous.

As if all of this isn't enough...we still have a load of landscaping bricks from 3 years ago to put around our drive way. But, I better not even add that to my list :)

Friday, February 11, 2011

Homemade Valentines

For those of you who know me, you know that I'm not a crafty person. I do love to scrapbook though. For Christmas this year Jason & the Boys got me a Cricut & a Gypsy. These are the coolest machines for anyone who even remotely likes to be creative. I have to admit though, I got very scared of them when I saw all the buttons & an operation manual that was like 200 pages long...so, in the corner it has sat since Christmas.

Well, yesterday I decided to get it out. I was going to make homemade valentines for Cole to take to school!

4 hours later...

Since it took awhile for me to figure it out, I put together 6 Teacher Valentines, and, opted to pop for the $2.50 box of valentines for the 40 kids :)

Maybe someday Cole & Jacob will get their Suzy Homemaker Mommy!